Docker Compose with an external LAN / VLAN IP!

I just figured this out, and it’s too cool not to share. I have business grade switches at my house, so I have various VLANs setup already. You’ll need that in place to make this work, and have your port tagging in place already, etc.

This requires no additional configuration on the host. In the below, I’ve included two examples — default_lan and vlan5. So if you just want to give a container an IP on your local LAN, you can use default_lan for that. And if you’re looking to create a service on a vlan IP, you can use vlan5 as an example for that.

EDIT: YOU MAY NEED TO modprobe 8021q (and/or add it to /etc/modules)

You do not need to include default_lan in order to use a vlan. This also of course works great in Portainer.

networks:
  default_lan: # the name you'll reference in the service configuration
    driver: ipvlan
    driver_opts:
      parent: enp1s0d1 # the interface on your docker host that it will tunnel through
    ipam:
      config:
        - subnet: 10.1.1.0/24 # your networks subnet
          gateway: 10.1.1.1 # your networks gateway

  vlan5:
    driver: ipvlan
    driver_opts:
      parent: enp1s0d1.5 # I've added '.5' for vlan 5
    ipam:
      config:
        - subnet: 10.1.5.0/24 # the vlans subnet
          gateway: 10.1.5.1 # the vlans gateway

services:
  service_on_lan:
    networks:
      default_lan:
        ipv4_address: 10.1.1.51

  service_on_vlan:
    networks:
      vlan5:
        ipv4_address: 10.1.5.55

I have not tested, but I believe you can also just add another two subnet and gateway lines for ipv6 routing as well, and then specify your ipv6_address in the service.

You can also use macvlan instead, which will give the container a unique MAC address that you can see on your network. I have found the best way to do this is individually per-IP, at least for my needs. Otherwise you can easily run into duplicate IP problems.

networks:
  macvlan5_5: # the name you'll reference in the service configuration, and I give _5 as the IP
    driver: macvlan
    driver_opts:
      parent: enp1s0d1.5 # the interface on your docker host and .# for the vlan #
    ipam:
      config:
        - subnet: 10.1.5.0/24 # your networks subnet
          gateway: 10.1.5.1 # your networks gateway
          ip_range: 10.1.5.5/32 # the static ip you want to assign to this networks container

And then just assign the network in your container:

services:
  service_on_macvlan5:
    networks:
      - macvlan5_5

Unfortunately, the container does not seem to try to register with the defined hostname so my firewall just sees a new ‘unknown’ host on the random MAC address in the arp tables.

Check out the complete Docker Network Drivers Overview page for more examples and usage.

Frigate Docker Compose / Portainer

You will need to have Mosquitto MQTT setup before using Frigate — fortunately, I have a guide for that already!

https://itbacon.com/2023/08/01/installing-mosquitto-mqtt-in-portainer/

Once you have confirmed Mosquitto is up and running, we can deploy a Frigate stack. This particular stack has a device mapping for a Google Coral A+E key device, as well as using /dev/dri/renderD128 for onboard graphics (Intel, in this case). You’ll want to adjust some things, such as whatever MQTT username and password you created during MQTT setup/install (see the guide for help!), as well as your camera admin username and password. If you use different usernames and passwords for all your cameras, you can specify them individually in your Frigate configuration file after the stack is deployed.

Also in this stack is a configuration for using a Samba/Windows based NAS as a volume for /media/frigate, which is where recordings and snapshots will be saved to. Basically, what I’m saying is, you’ll need to make some changes to the below code after pasting it, in order to have it suit your needs.

The majority of my configuration file was taken from the Full Reference Configuration File which is an excellent reference with comments about the various options in the configuration file.

I had also initially planned to include my nvidia setup/configuration sections, but the machine I just moved Frigate into can only take one full length card, I have used it for something else.

services:
  frigate:
    container_name: "frigate"
    image: "ghcr.io/blakeblackshear/frigate:stable"
    hostname: "frigate"
    shm_size: 1024mb # increase if getting bus errors
    privileged: true
    restart: unless-stopped
    cap_add:
      - CAP_PERFMON
    devices:
      - /dev/dri/renderD128:/dev/dri/renderD128:ro # onboard video
      - /dev/apex_0:/dev/apex_0:ro # coral
    environment:
      - "TZ=EST5EDT" # your timezone
      - "FRIGATE_RTSP_USERNAME=admin" # camera admin username
      - "FRIGATE_RTSP_PASSWORD=password" # camera admin password
      - "FRIGATE_MQTT_USERNAME=frigate" # mqtt server username
      - "FRIGATE_MQTT_PASSWORD=password" # mqtt server password
    network_mode: host
    volumes:
      - /etc/localtime:/etc/localtime:ro
      - data:/config
      # if you're not using a NAS, change NAS to the path you're using
      # e.g. /mnt/frigate:/media/frigate or /any/path:/media/frigate
      - NAS:/media/frigate
      - type: tmpfs
        target: /tmp/cache
        tmpfs:
          size: 1G

volumes:
  data:
  mqtt_data:
  NAS:
    driver_opts:
      type: cifs
      o: "addr=IP.OF.NAS,username=SAMBA_USERNAME,password=SAMBA_PASSWORD,iocharset=utf8,file_mode=0600,dir_mode=0700"
      device: "//IP.OF.NAS/SharedFolder"

networks:
  frigate:

Here is my Frigate configuration file. It will be in /var/lib/docker/volumes/frigate_data/_data/config.yml

I know it’s kind of a mess, and there’s probably some redundant things in here, but I just felt bad about not having anything up still after so long. So there’s definitely some useful examples in here I imagine, for Amcrest, Reolink, Hikvision cameras. Examples of how to use separate streams for recording and detection, etc. Unfortunately at the time of writing all of this up tonight, I am extremely tired and must just get it out as is at this point.

Now, admittedly, full on support and assistance with configuring your Frigate NVR is vastly out of the scope of this guide. There is plenty of great documentation already available on the Official Frigate Website. Good luck!

mqtt:
  enabled: true
  host: 10.1.1.5 # the IP of the computer running MQTT, or localhost
  port: 1883
  topic_prefix: frigate
  client_id: frigate
  user: '{FRIGATE_MQTT_USERNAME}'
  password: '{FRIGATE_MQTT_PASSWORD}'
  stats_interval: 30

detectors:
  coral:
    type: edgetpu
    device: pci
  #cuda:
  #  type: tensorrt
  #  device: 0
  #openvino:
  #  type: openvino
  #  device: AUTO
  #cpu:
  #  type: cpu
  #  num_threads: 2

database:
  path: /config/frigate.db

logger:
  # Optional: Default log verbosity
  default: warning
  #default: warning
  # Optional: Component specific logger overrides
  #logs:
  #  frigate.nginx: error
  #  frigate.event: error

birdseye:
  enabled: true
  restream: true
  width: 1280
  height: 720
  quality: 7
  # motion (if motion was detected), objects (if it detected an object), or continuous (always on)
  mode: continuous

ffmpeg:
  global_args: -hide_banner -loglevel warning -threads 2
  #hwaccel_args: preset-vaapi
  hwaccel_args: preset-intel-qsv-h264
  #hwaccel_args: preset-nvidia-h264

  #input_args: preset-rtsp-generic
  input_args: preset-rtsp-restream
  output_args:
    record: preset-record-generic-audio-copy

# default detect settings for all cameras
detect:
  enabled: true
  width: 704
  height: 480

  fps: 10
  max_disappeared: 50
  stationary:
    interval: 10
    threshold: 50

# default object tracking for all cameras
objects:
  track:
  - person
  #filters:
  #  person:
  #    min_area: 100
  #    max_area: 75000

motion:
  threshold: 25
  contour_area: 25
  delta_alpha: 0.2
  frame_alpha: 0.2
  frame_height: 75
  improve_contrast: false
  mqtt_off_delay: 30

# default record settings for all cameras
record:
  enabled: true
  expire_interval: 60
  retain:
    days: 15
    mode: all
  events:
    pre_capture: 5
    post_capture: 5
    objects:
    - person
    retain:
      default: 15
      mode: all

snapshots:
  enabled: true
  clean_copy: true
  timestamp: false
  bounding_box: true
  crop: false
  retain:
    default: 15

# configure your cameras here
go2rtc:
  streams:
    # reolink poe doorbell
    doorbell:
    - ffmpeg:rtsp://{FRIGATE_RTSP_USERNAME}:{FRIGATE_RTSP_PASSWORD}@10.1.5.108:554/h264Preview_01_main#video=copy#audio=copy#audio=opus
    doorbell_sub:
    - ffmpeg:rtsp://{FRIGATE_RTSP_USERNAME}:{FRIGATE_RTSP_PASSWORD}@10.1.5.108:554/h264Preview_01_sub#video=copy
    # amcrest
    front:
    - rtsp://{FRIGATE_RTSP_USERNAME}:{FRIGATE_RTSP_PASSWORD}@10.1.5.114:554/cam/realmonitor?channel=1&subtype=0
    - ffmpeg:back#audio=opus
    front_sub:
    - rtsp://{FRIGATE_RTSP_USERNAME}:{FRIGATE_RTSP_PASSWORD}@10.1.5.114:554/cam/realmonitor?channel=1&subtype=1
    # amcrest
    back:
    - rtsp://{FRIGATE_RTSP_USERNAME}:{FRIGATE_RTSP_PASSWORD}@10.1.5.107:554/cam/realmonitor?channel=1&subtype=0
    - ffmpeg:back#audio=opus
    back_sub:
    - rtsp://{FRIGATE_RTSP_USERNAME}:{FRIGATE_RTSP_PASSWORD}@10.1.5.107:554/cam/realmonitor?channel=1&subtype=1
    # amcrest
    porch:
    - rtsp://{FRIGATE_RTSP_USERNAME}:{FRIGATE_RTSP_PASSWORD}@10.1.5.106:554/cam/realmonitor?channel=1&subtype=0
    - ffmpeg:porch#audio=opus
    porch_sub:
    - rtsp://{FRIGATE_RTSP_USERNAME}:{FRIGATE_RTSP_PASSWORD}@10.1.5.106:554/cam/realmonitor?channel=1&subtype=1
    # amcrest wifi camera
    livingroom:
    - rtsp://{FRIGATE_RTSP_USERNAME}:{FRIGATE_RTSP_PASSWORD}@10.1.5.112:554/cam/realmonitor?channel=1&subtype=0&authbasic=64
    - ffmpeg:livingroom#audio=opus
    livingroom_sub:
    - rtsp://{FRIGATE_RTSP_USERNAME}:{FRIGATE_RTSP_PASSWORD}@10.1.5.112:554/cam/realmonitor?channel=1&subtype=1&authbasic=64
    # hikvision
    basement:
    - rtsp://{FRIGATE_RTSP_USERNAME}:{FRIGATE_RTSP_PASSWORD}@10.1.5.104:554/Streaming/Channels/101
    - ffmpeg:basement#video=copy
    #basement_sub:
    #- rtsp://{FRIGATE_RTSP_USERNAME}:{FRIGATE_RTSP_PASSWORD}@10.1.5.104:554/Streaming/Channels/102
    #- ffmpeg:basement#video=copy

# we use localhost because go2rtc is restreaming them locally based on the names we gave them above
cameras:
  doorbell:
    enabled: true
    ffmpeg:
      inputs:
      - path: rtsp://localhost:8554/doorbell
        roles:
        - record
      - path: rtsp://localhost:8554/doorbell_sub
        roles:
        - detect
    detect:
      enabled: true
      width: 640
      height: 480
    objects:
      track:
      - person
    mqtt:
      enabled: true
      timestamp: true
      bounding_box: true
      crop: true
      height: 720
      quality: 92
    live:
      height: 720
      quality: 7
    ui:
      order: 1
    #motion:
    #  mask:
    #  - 640,0,640,309,605,335,482,368,252,366,0,311,0,0
  front:
    enabled: true
    ffmpeg:
      inputs:
      - path: rtsp://localhost:8554/front
        roles:
        - record
    detect:
      enabled: true
    record:
      events:
        #required_zones:
        #- FrontYard
        retain:
          default: 15
    objects:
      track:
      - person
      - cat
    mqtt:
      enabled: true
      timestamp: true
      bounding_box: true
      crop: true
      height: 720
      quality: 92
    live:
      height: 720
      quality: 7
    ui:
      order: 2
    #motion:
    #  mask:
    #  - 704,0,704,202,0,150,0,0
    #zones:
    #  FrontYard:
    #    coordinates: 650,196,82,136,0,228,0,480,704,480
  back:
    enabled: true
    ffmpeg:
      inputs:
      - path: rtsp://localhost:8554/back
        roles:
        - record
      - path: rtsp://localhost:8554/back_sub
        roles:
        - detect
    record:
      events:
        #required_zones:
        #- BackYard
        retain:
          default: 15
    objects:
      track:
      - person
      - cat
    mqtt:
      enabled: true
      timestamp: true
      bounding_box: true
      crop: true
      height: 720
      quality: 92
    live:
      height: 720
      quality: 7
    ui:
      order: 3
    #motion:
    #  mask:
    #  - 291,0,288,41,0,39,0,0
    #zones:
    #  BackYard:
    #    coordinates: 374,0,600,480,0,480,0,0
  porch:
    enabled: true
    ffmpeg:
      inputs:
      - path: rtsp://localhost:8554/porch
        roles:
        - record
      - path: rtsp://localhost:8554/porch_sub
        roles:
        - detect
    record:
      events:
        retain:
          default: 15
    objects:
      track:
      - person
      - cat
    mqtt:
      enabled: true
      timestamp: true
      bounding_box: true
      crop: true
      height: 720
      quality: 92
    live:
      height: 720
      quality: 7
    ui:
      order: 4
    #motion:
    #  mask:
    #  - 261,0,270,104,323,223,367,333,480,348,534,76,640,51,640,480,0,480,0,0
  livingroom:
    enabled: true
    ffmpeg:
      inputs:
      - path: rtsp://localhost:8554/livingroom
        roles:
        - record
      - path: rtsp://localhost:8554/livingroom_sub
        roles:
        - detect
    detect:
      enabled: true
    record:
      events:
        objects:
        - cat
        retain:
          default: 15
    objects:
      track:
      - cat
    mqtt:
      enabled: true
      timestamp: true
      bounding_box: true
      crop: true
      height: 720
      quality: 92
    live:
      height: 720
      quality: 7
    ui:
      order: 5

  basement:
    enabled: true
    ffmpeg:
      inputs:
      - path: rtsp://localhost:8554/basement
        roles:
        - record
        - detect
    record:
      events:
        #required_zones:
        #- BasementStairs
        objects:
        - cat
        retain:
          default: 15
    detect:
      enabled: true
      width: 1280
      height: 720
      fps: 10
    objects:
      track:
      - cat
    mqtt:
      enabled: true
      timestamp: true
      bounding_box: true
      crop: true
      height: 720
      quality: 92
    live:
      height: 720
      quality: 7
    ui:
      order: 6

timestamp_style:
  position: tl
  format: '%m/%d/%Y %H:%M:%S'
  color:
    red: 255
    green: 255
    blue: 255
  thickness: 1
  effect: solid

ui:
  live_mode: webrtc
  timezone: EST5EDT
  use_experimental: false
  time_format: 12hour
  date_style: short
  time_style: medium
  strftime_fmt: '%Y/%m/%d %H:%M'

telemetry:
  version_check: true

Portainer as Docker Compose file

Updating portainer becomes:
docker compose down
docker pull portainer/portainer-ce:latest
docker compose up -d

version: '3.0'
services:
  portainer:
    container_name: portainer
    hostname: portainer
    command: --sslcert /certs/lan.fullchain --sslkey /certs/lan.key
    image: portainer/portainer-ce:latest
    restart: unless-stopped
    network_mode: bridge
    environment:
      - "TZ=EST5EDT"
    ports:
      - 9443:9443
    volumes:
      - data:/data
      - /ssl/lancerts:/certs:ro
      - /etc/localtime:/etc/localtime:ro
      - /var/run/docker.sock:/var/run/docker.sock

volumes:
  data:

Paste the above into a docker-compose.yml file, I placed mine in a ‘portainer’ folder inside my home directory. Then just run docker compose up -d

I use a folder on my system, /ssl/lancerts, which I map to /certs inside the container. You will have to modify your certificate locations in the volumes section, and the command line towards the top of the compose file. If you are not using SSL, then simply comment out or remove the command line at the top of the compose file and remove the volume mapping.

Installing Mosquitto MQTT in Portainer

Updated 9-2-2023: fixed a path issue

This is fairly quick, with some configuration edits required at the end. In this guide, we will be installing Mosquitto MQTT inside of Portainer. If you need to install Portainer, that guide is available here.

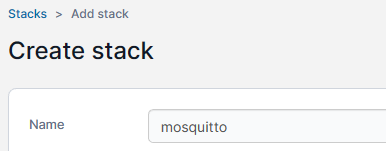
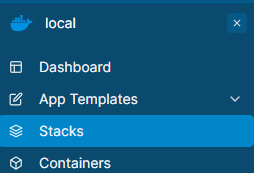
In your Portainer environment (local typically), click on Stacks on the left hand side. Then on the right hand of the page, click on + Add Stack. At the top of the add stack screen you’ll need to give your stack a name. This name will also be prepended to any volumes we create in the stack. I chose mosquitto for my stack name.

Then, you’ll need to paste in a compose file. Here is what I’m using, and what the remainder of the guide will be based upon:

volumes:
  data:

services:
  mosquitto:
    container_name: "mosquitto"
    restart: "unless-stopped"
    environment:
      - "TZ=EST5EDT"

    hostname: "mqtt"
    image: "eclipse-mosquitto"
    network_mode: host
    ports:
      - "1883:1883/tcp"

    volumes:
      - "/etc/localtime:/etc/localtime:ro"
      - "data:/mosquitto/config"
      - "data:/mosquitto/data"
      - "data:/mosquitto/log"

You’ll want to change EST5EDT to a location in your timezone (see this list to get yours).
You may also want to change the hostname, Personally, I have not made use of the hostnames. You can remove it entirely for a randomly generated hostname.

In my volumes section, I have mapped localtime. I don’t know that this is necessary (same for the TZ environment variable), but I like to just add them to everything in case something does need it. Frigate, for example, definitely does.

The compose file will create a volume, mosquitto_data, and everything will reside in that volumes root directory (/var/lib/docker/volumes/mosquitto_data/_data).

You’ll want to deploy the stack at this point, and then stop the stack shortly after so we can make a few changes.

Open up a shell, or SSH into your server, and become the root user, either with su if you know your root password, or sudo su.

cd /var/lib/docker/volumes/mosquitto_data/_data
touch passwd
nano -w mosquitto.conf

Please also take note of the touch passwd command in the above snippet. This will create a blank passwd file for us to use in a moment.

I use nano to edit my files, you can use whichever editor you are comfortable with. If you’re in a GUI, I can’t help you. Below are the main changes you’ll need to make. Since /mosquitto/data is mapped to the mosquitto_data volume, there is no need to make any subfolders.

mosquitto.conf:

# if you change the listener, you'll need to change your stack port to match
listener 1883
persistence true
persistence_file mosquitto.db
persistence_location /mosquitto/data

# logging to stderr will show the logs in portainers logs output
log_dest stderr
# you can also log to a file:
log_dest file /mosquitto/log/mosquitto.log
# the types of log entries we will receive:
log_type error
log_type warning
log_type notice
log_type information
log_timestamp true
log_timestamp_format %Y-%m-%dT%H:%M:%S

# do not allow anonymous access to this mqtt server
allow_anonymous false

# the password file for mosquitto mqtt
password_file /mosquitto/data/passwd

After the configuration file is in place, the last step is to add a user for accessing Mosquitto (quick edit: I believe you’ll need to start your mosquitto stack before the below command will work):

docker exec -it mosquitto mosquitto_passwd /mosquitto/data/passwd your_mqtt_username

Run the above command as sudo, or as a user that is part of the docker group. It will prompt you for a password which is up to you to create. You can replace your_mqtt_username with whatever makes sense to you. For example, my MQTT user is frigate so that Frigate NVR can access the MQTT server as a user named frigate. You may just want to add one generic user instead and use that for all services.

And that’s it! You should now be able to start your Mosquitto stack and the logs should indicate it is listening on port 1883.

2023-08-01T15:29:12: mosquitto version 2.0.15 starting
2023-08-01T15:29:12: Config loaded from /mosquitto/config/mosquitto.conf.
2023-08-01T15:29:12: Opening ipv4 listen socket on port 1883.
2023-08-01T15:29:12: Opening ipv6 listen socket on port 1883.
2023-08-01T15:29:12: mosquitto version 2.0.15 running

Random side note: If you want to install nano inside of the mosquitto container for some reason (docker exec -it mosquitto sh), you’ll need to use the apk command. apk update; apk add nano

Installing Docker & Portainer

Updated 9-2-2023: fixed a few path issues

If you do not have Docker installed already, here is the link to install Docker (properly) on Ubuntu Linux:
https://docs.docker.com/engine/install/ubuntu/

curl -fsSL https://download.docker.com/linux/ubuntu/gpg | sudo gpg --dearmor -o /etc/apt/trusted.gpg.d/docker-ubuntu.gpg

echo "deb [arch="$(dpkg --print-architecture)" signed-by=/etc/apt/trusted.gpg.d/docker-ubuntu.gpg] https://download.docker.com/linux/ubuntu "$(. /etc/os-release && echo "$VERSION_CODENAME")" stable" | sudo tee /etc/apt/sources.list.d/docker.list > /dev/null

sudo apt update; sudo apt install docker-ce docker-ce-cli containerd.io docker-buildx-plugin docker-compose-plugin

And to install Portainer, you can follow their official instructions:
https://docs.portainer.io/start/install-ce/server/docker/linux

But basically it comes down to the below two commands.

The second ‘docker run’ command is what you would use if you have an SSL certificate and key to use. In the second command, I am mapping the local folder /etc/ssl/private to inside the portainer docker container as /certs. So then Portainer can reference the certificates at /certs. You’ll need to change the path to match where you store the certificates.

docker volume create portainer_data

docker run -d --name portainer -p 9443:9443 --restart always -v /var/run/docker.sock:/var/run/docker.sock -v portainer_data:/data portainer/portainer-ce:latest

If you want to install Portainer with SSL support, map your SSL certificate directory (in this example, to /certs) and add the sslcert and sslkey options:

docker run -d --name portainer -p 9443:9443 --restart always -v /var/run/docker.sock:/var/run/docker.sock -v /etc/ssl/private:/certs:ro -v portainer_data:/data portainer/portainer-ce:latest --sslcert /certs/yourcert.crt --sslkey /certs/yourcert.key

Once installed, you can access Portainer at http://<machine.ip>:9443 (or https:// if using SSL)

Click on the “local” environment in the middle of the page to connect to it after logging in.

Stacks on the left hand menu is where you can go to paste Docker-Compose files which we will be using in the following guides.

Containers is where anything you start from the command line will show up (using docker run).

Docker + Portainer + Frigate + Mosquito MQTT…

Update 9-02-2023: I’ve stopped using HomeAssistant as it’s just not for me.

Update 8-01-2023: Ok! I feel fairly confident with everything now. Inititally my plan was to just give some docker run commands that would get everyone up and running quickly. But I have since discovered Stacks in Portainer, and I feel this is a much better method for deploying containers. Especially since it offers an easy way to upgrade them. Truly hope to have something together eventually!

Update 7-18-2023: I’ve managed to get an iPhone, an OBS stream, and my Amcrest camera into frigate using go2rtc as a restream source. Guide is coming along nicely!

…guide will be coming soon. I am slowly learning it all this weekend. I am really enjoying Portainer. I have a camera arriving tomorrow, an Amcrest one, and hope to have everything up and running by next weekend. Then I can begin taking some screenshots for the guide.

The absolute mixture and mess across the internet has made this challenging at best. But I really want to run my own NVR!

Oh yeah, and I’ll include Google Coral AI support as well assuming the card I ordered works in the PC I’m using for frigate. Hoping to make use of the wifi card slot.

I’m using Ubuntu for the base OS. Personally, I enabled auto-login and screen sharing so I can remote desktop in to it. I may switch to just plain VNC later on but this is working well for me at the moment. As I’ve always been a Gentoo Linux guy, learning Ubuntu (well, Gnome) has been interesting too. I haven’t ran a window manager in YEARS!