ITBacon is now ARMed!

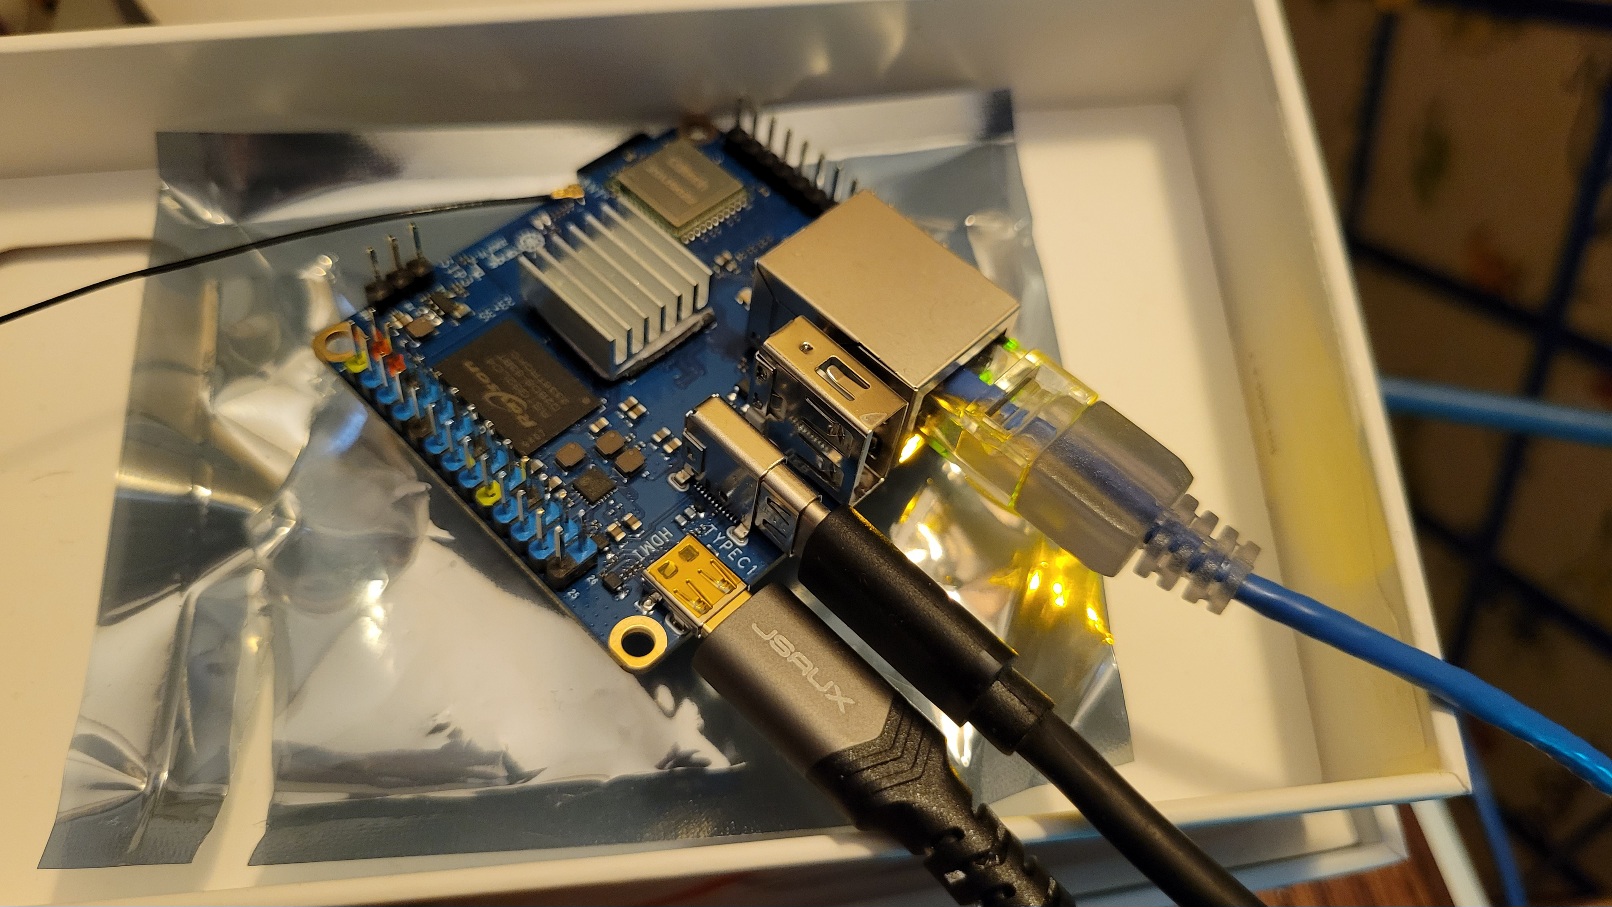
…with an Orange-Pi Zero 3! I’ve moved the website to this tiny little device that doesn’t even have a home yet.

A case of sorts is on the way. I did attach a heatsink to the CPU in the above picture, which was not included.

My impressions so far are very positive. I’m running their Ubuntu image and haven’t had any problems. It reboots in several seconds. It runs the website very well.

I even toyed around with building an arm version of q2pro with no problems at all.

Only downsides: USB 2.0 port not 3.0, and SD slot speed. SD speed is maxed around 22-24MB/s. So a high speed card will not make a difference.

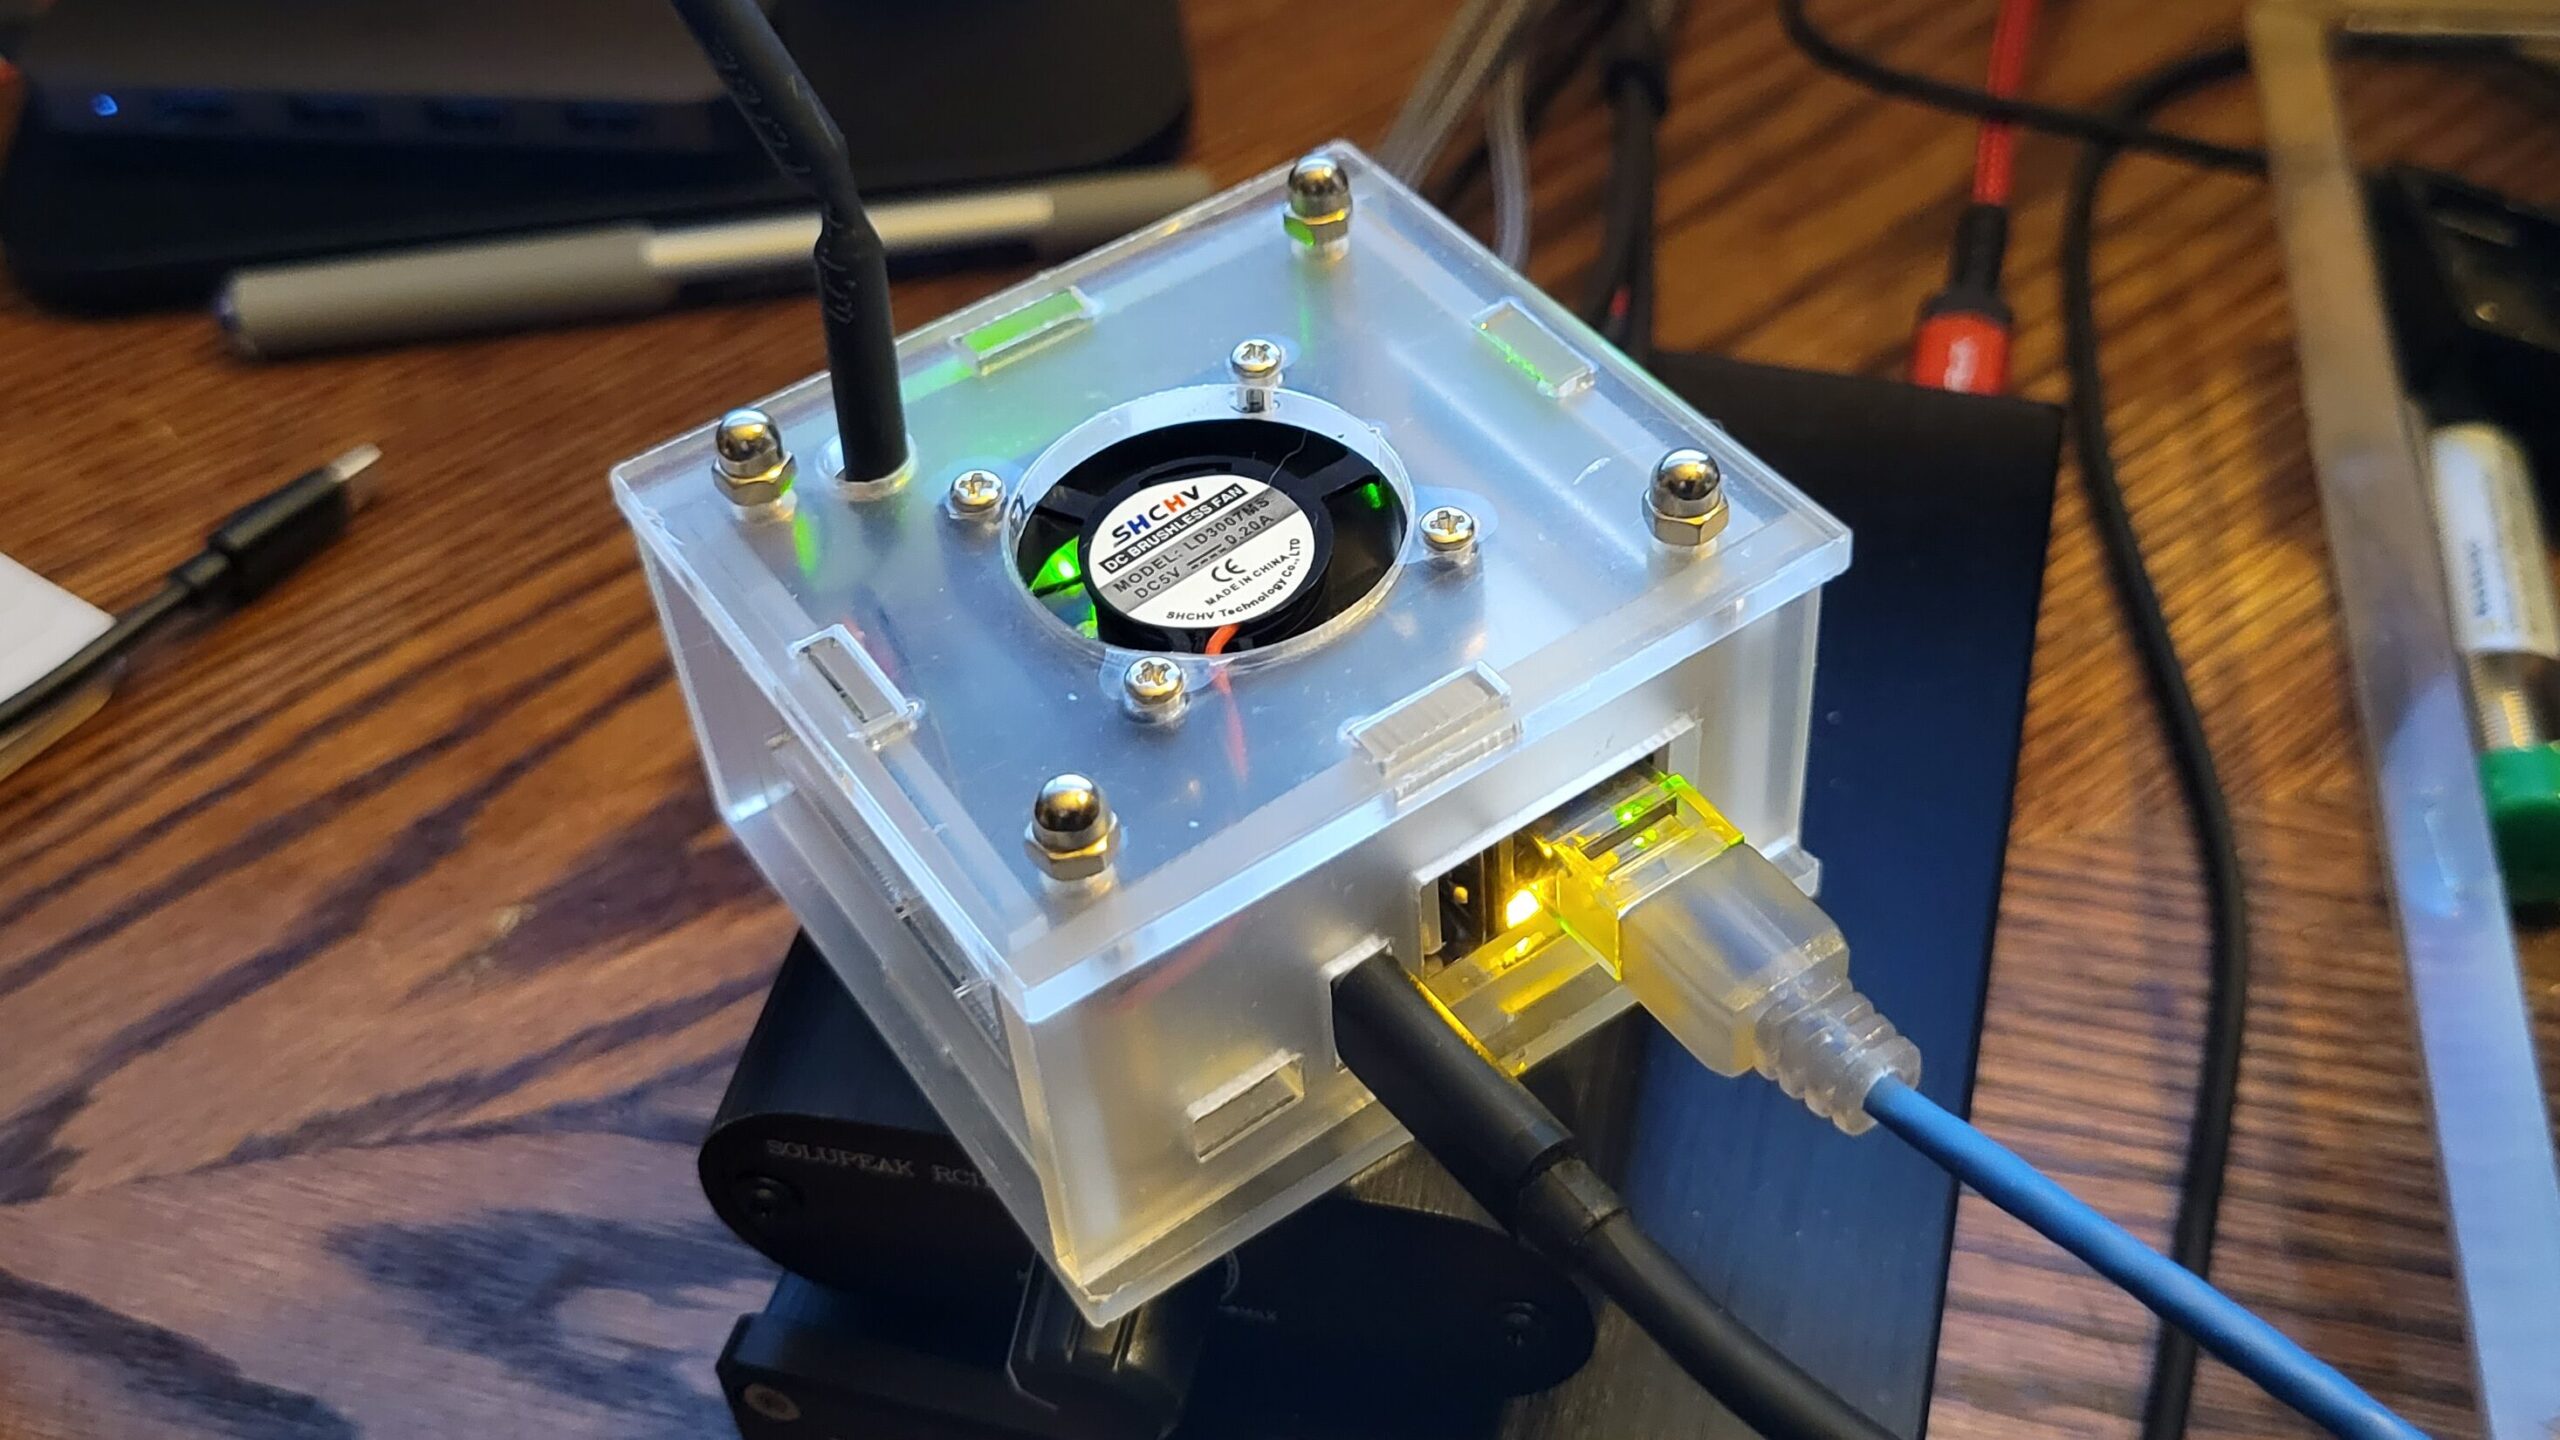
Update: Now with a home of its own! This little fan lowered temps by 13+⁰C!

Quake 2

Update: Please see https://quake2.itbacon.com for more information! Come check out my jump server, itbacon.com:27920

Had a lot of fun learning meson environments this weekend, and finally building a 32bit version of q2pro (in Ubuntu) to load old mods that never released source code. Now I can load gamei386.so mods. I even compiled an i386 version of q2admin just for the heck of it. I love how everything works still.

PacketFlingers excellent work with PakServe and pakutil made creating compressed pkz files a breeze.

Skullernets excellent work on q2pro made using it all just as easy. HTTP downloads, etc.

It’s absolutely wild to me that I can still load a quake2 mod from 20 years ago on a modern system. And everything works.

I’m running the best quake2 servers of my life and there’s nobody to use them anymore! It’s maddening.

I think I am mainly doing this for my own nostalgia at this point. There are definitely still a number of quake2 servers out there but there’s only a small, small handful of people.

I’d give anything for a truly active q2 community again. I want to play weapons factory, and freeze tag, and rocket arena, and expert CTF again.

RoT MUD v1.4 with OLC 2023

File: rot1.4wolc2023.tgz

Here is a version of the RoT MUD source code, version 1.4 with OLC, that compiles for me on Ubuntu 22.04.3 LTS.

It seems MUD resources are growing very thin these days. I’d like to remedy that if possible. If my brain doesn’t find something else to fixate on for a while.

I’ve included a README file in the main folder that outlines the couple of minor changes I made.

Action Quake 2 servers!

Update 9-15-2023: All servers are now running q2pro instead of r1q2. I’ve disabled the anticheat module because it’s 2023…I believe this should allow Linux clients to play as well.

I decided to throw up an original Action Quake 2 server! I’ll probably make a whole subdomain for this so stay tuned if you’re interested. I’ll be sure to post downloads etc.

You can vote the map with vote map <map>

Check it out if you want, from the Quake2 console:
– Team Deathmatch: connect itbacon.com:27910
– Deathmatch: connect itbacon.com:27911
– Jump Mod: connect itbacon.com:27912 (this is where I’ll usually be!)

Recent Downtime

Power outages from storms the last couple of weeks have caused some recent downtime. Apologies for that! I guess 30-45min of battery backup just hasn’t been enough. Unfortunately, currently, I have no plans to move itbacon.com. At least not unless it gets way, way more popular!

Plex Media Server – Convert CRT to Plex SSL Compatible Certificate

If you’re like me and you use Let’s Encrypt, then it seems sometime semi-recently Plex changed the way their SSL certificates work. I used to just generate a simple .p12 certificate to use with Plex, but it seems that wasn’t good enough anymore.

After some research, it appears the encryption algorithms needed to be updated on the certificate I was generating.

Simply adding the following to my openssl command solved the problem:
-certpbe AES-256-CBC -keypbe AES-256-CBC -macalg SHA256

So the full command becomes something like this:
openssl pkcs12 -certpbe AES-256-CBC -keypbe AES-256-CBC -macalg SHA256 -export -out plex.p12 -inkey your.com.key -in your.com.crt -certfile your.com.ca

I just hit the enter key when it asks for a password since I am only using this certificate locally. You could add -passout ‘pass:’ to do that automatically. Which works wonderfully as I just scp my certs out of pfSense from /cf/conf/acme. I’ve still been experimenting with that and in some cases, e.g. unifi, I’ve found it better to use the fullchain file and not the all file. In other cases I use the all.pem file.

In Plex > Network settings, set the path to this certificate and leave the key field blank.

Installing Mosquitto MQTT in Portainer

Updated 9-2-2023: fixed a path issue

This is fairly quick, with some configuration edits required at the end. In this guide, we will be installing Mosquitto MQTT inside of Portainer. If you need to install Portainer, that guide is available here.

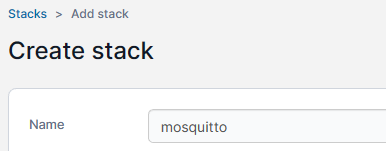
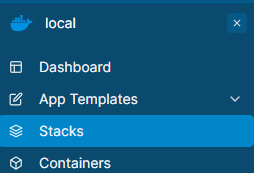
In your Portainer environment (local typically), click on Stacks on the left hand side. Then on the right hand of the page, click on + Add Stack. At the top of the add stack screen you’ll need to give your stack a name. This name will also be prepended to any volumes we create in the stack. I chose mosquitto for my stack name.

Then, you’ll need to paste in a compose file. Here is what I’m using, and what the remainder of the guide will be based upon:

volumes:
  data:

services:
  mosquitto:
    container_name: "mosquitto"
    restart: "unless-stopped"
    environment:
      - "TZ=EST5EDT"

    hostname: "mqtt"
    image: "eclipse-mosquitto"
    network_mode: host
    ports:
      - "1883:1883/tcp"

    volumes:
      - "/etc/localtime:/etc/localtime:ro"
      - "data:/mosquitto/config"
      - "data:/mosquitto/data"
      - "data:/mosquitto/log"

You’ll want to change EST5EDT to a location in your timezone (see this list to get yours).
You may also want to change the hostname, Personally, I have not made use of the hostnames. You can remove it entirely for a randomly generated hostname.

In my volumes section, I have mapped localtime. I don’t know that this is necessary (same for the TZ environment variable), but I like to just add them to everything in case something does need it. Frigate, for example, definitely does.

The compose file will create a volume, mosquitto_data, and everything will reside in that volumes root directory (/var/lib/docker/volumes/mosquitto_data/_data).

You’ll want to deploy the stack at this point, and then stop the stack shortly after so we can make a few changes.

Open up a shell, or SSH into your server, and become the root user, either with su if you know your root password, or sudo su.

cd /var/lib/docker/volumes/mosquitto_data/_data
touch passwd
nano -w mosquitto.conf

Please also take note of the touch passwd command in the above snippet. This will create a blank passwd file for us to use in a moment.

I use nano to edit my files, you can use whichever editor you are comfortable with. If you’re in a GUI, I can’t help you. Below are the main changes you’ll need to make. Since /mosquitto/data is mapped to the mosquitto_data volume, there is no need to make any subfolders.

mosquitto.conf:

# if you change the listener, you'll need to change your stack port to match
listener 1883
persistence true
persistence_file mosquitto.db
persistence_location /mosquitto/data

# logging to stderr will show the logs in portainers logs output
log_dest stderr
# you can also log to a file:
log_dest file /mosquitto/log/mosquitto.log
# the types of log entries we will receive:
log_type error
log_type warning
log_type notice
log_type information
log_timestamp true
log_timestamp_format %Y-%m-%dT%H:%M:%S

# do not allow anonymous access to this mqtt server
allow_anonymous false

# the password file for mosquitto mqtt
password_file /mosquitto/data/passwd

After the configuration file is in place, the last step is to add a user for accessing Mosquitto (quick edit: I believe you’ll need to start your mosquitto stack before the below command will work):

docker exec -it mosquitto mosquitto_passwd /mosquitto/data/passwd your_mqtt_username

Run the above command as sudo, or as a user that is part of the docker group. It will prompt you for a password which is up to you to create. You can replace your_mqtt_username with whatever makes sense to you. For example, my MQTT user is frigate so that Frigate NVR can access the MQTT server as a user named frigate. You may just want to add one generic user instead and use that for all services.

And that’s it! You should now be able to start your Mosquitto stack and the logs should indicate it is listening on port 1883.

2023-08-01T15:29:12: mosquitto version 2.0.15 starting
2023-08-01T15:29:12: Config loaded from /mosquitto/config/mosquitto.conf.
2023-08-01T15:29:12: Opening ipv4 listen socket on port 1883.
2023-08-01T15:29:12: Opening ipv6 listen socket on port 1883.
2023-08-01T15:29:12: mosquitto version 2.0.15 running

Random side note: If you want to install nano inside of the mosquitto container for some reason (docker exec -it mosquitto sh), you’ll need to use the apk command. apk update; apk add nano
Installing Docker & Portainer

Updated 9-2-2023: fixed a few path issues

If you do not have Docker installed already, here is the link to install Docker (properly) on Ubuntu Linux:
https://docs.docker.com/engine/install/ubuntu/

curl -fsSL https://download.docker.com/linux/ubuntu/gpg | sudo gpg --dearmor -o /etc/apt/trusted.gpg.d/docker-ubuntu.gpg

echo "deb [arch="$(dpkg --print-architecture)" signed-by=/etc/apt/trusted.gpg.d/docker-ubuntu.gpg] https://download.docker.com/linux/ubuntu "$(. /etc/os-release && echo "$VERSION_CODENAME")" stable" | sudo tee /etc/apt/sources.list.d/docker.list > /dev/null

sudo apt update; sudo apt install docker-ce docker-ce-cli containerd.io docker-buildx-plugin docker-compose-plugin

And to install Portainer, you can follow their official instructions:
https://docs.portainer.io/start/install-ce/server/docker/linux

But basically it comes down to the below two commands.

The second ‘docker run’ command is what you would use if you have an SSL certificate and key to use. In the second command, I am mapping the local folder /etc/ssl/private to inside the portainer docker container as /certs. So then Portainer can reference the certificates at /certs. You’ll need to change the path to match where you store the certificates.

docker volume create portainer_data

docker run -d --name portainer -p 9443:9443 --restart always -v /var/run/docker.sock:/var/run/docker.sock -v portainer_data:/data portainer/portainer-ce:latest

If you want to install Portainer with SSL support, map your SSL certificate directory (in this example, to /certs) and add the sslcert and sslkey options:

docker run -d --name portainer -p 9443:9443 --restart always -v /var/run/docker.sock:/var/run/docker.sock -v /etc/ssl/private:/certs:ro -v portainer_data:/data portainer/portainer-ce:latest --sslcert /certs/yourcert.crt --sslkey /certs/yourcert.key

Once installed, you can access Portainer at http://<machine.ip>:9443 (or https:// if using SSL)

Click on the “local” environment in the middle of the page to connect to it after logging in.

Stacks on the left hand menu is where you can go to paste Docker-Compose files which we will be using in the following guides.

Containers is where anything you start from the command line will show up (using docker run).

Docker + Portainer + Frigate + Mosquito MQTT…

Update 9-02-2023: I’ve stopped using HomeAssistant as it’s just not for me.

Update 8-01-2023: Ok! I feel fairly confident with everything now. Inititally my plan was to just give some docker run commands that would get everyone up and running quickly. But I have since discovered Stacks in Portainer, and I feel this is a much better method for deploying containers. Especially since it offers an easy way to upgrade them. Truly hope to have something together eventually!

Update 7-18-2023: I’ve managed to get an iPhone, an OBS stream, and my Amcrest camera into frigate using go2rtc as a restream source. Guide is coming along nicely!

…guide will be coming soon. I am slowly learning it all this weekend. I am really enjoying Portainer. I have a camera arriving tomorrow, an Amcrest one, and hope to have everything up and running by next weekend. Then I can begin taking some screenshots for the guide.

The absolute mixture and mess across the internet has made this challenging at best. But I really want to run my own NVR!

Oh yeah, and I’ll include Google Coral AI support as well assuming the card I ordered works in the PC I’m using for frigate. Hoping to make use of the wifi card slot.

I’m using Ubuntu for the base OS. Personally, I enabled auto-login and screen sharing so I can remote desktop in to it. I may switch to just plain VNC later on but this is working well for me at the moment. As I’ve always been a Gentoo Linux guy, learning Ubuntu (well, Gnome) has been interesting too. I haven’t ran a window manager in YEARS!