Updated 9-2-2023: fixed a path issue
This is fairly quick, with some configuration edits required at the end. In this guide, we will be installing Mosquitto MQTT inside of Portainer. If you need to install Portainer, that guide is available here.
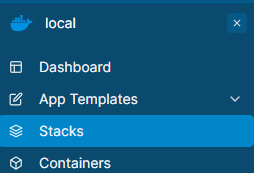
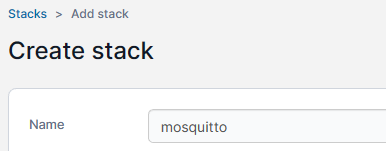
In your Portainer environment (local typically), click on Stacks on the left hand side. Then on the right hand of the page, click on + Add Stack. At the top of the add stack screen you’ll need to give your stack a name. This name will also be prepended to any volumes we create in the stack. I chose mosquitto for my stack name.
Then, you’ll need to paste in a compose file. Here is what I’m using, and what the remainder of the guide will be based upon:
volumes:
  data:

services:
  mosquitto:
    container_name: "mosquitto"
    restart: "unless-stopped"
    environment:
      - "TZ=EST5EDT"

    hostname: "mqtt"
    image: "eclipse-mosquitto"
    network_mode: host
    ports:
      - "1883:1883/tcp"

    volumes:
      - "/etc/localtime:/etc/localtime:ro"
      - "data:/mosquitto/config"
      - "data:/mosquitto/data"
      - "data:/mosquitto/log"
You’ll want to change EST5EDT to a location in your timezone (see this list to get yours).
You may also want to change the hostname, Personally, I have not made use of the hostnames. You can remove it entirely for a randomly generated hostname.
In my volumes section, I have mapped localtime. I don’t know that this is necessary (same for the TZ environment variable), but I like to just add them to everything in case something does need it. Frigate, for example, definitely does.
The compose file will create a volume, mosquitto_data, and everything will reside in that volumes root directory (/var/lib/docker/volumes/mosquitto_data/_data).
You’ll want to deploy the stack at this point, and then stop the stack shortly after so we can make a few changes.
Open up a shell, or SSH into your server, and become the root user, either with su if you know your root password, or sudo su.
cd /var/lib/docker/volumes/mosquitto_data/_data
touch passwd
nano -w mosquitto.conf
Please also take note of the touch passwd command in the above snippet. This will create a blank passwd file for us to use in a moment.
I use nano to edit my files, you can use whichever editor you are comfortable with. If you’re in a GUI, I can’t help you. Below are the main changes you’ll need to make. Since /mosquitto/data is mapped to the mosquitto_data volume, there is no need to make any subfolders.
mosquitto.conf:
# if you change the listener, you'll need to change your stack port to match
listener 1883
persistence true
persistence_file mosquitto.db
persistence_location /mosquitto/data

# logging to stderr will show the logs in portainers logs output
log_dest stderr
# you can also log to a file:
log_dest file /mosquitto/log/mosquitto.log
# the types of log entries we will receive:
log_type error
log_type warning
log_type notice
log_type information
log_timestamp true
log_timestamp_format %Y-%m-%dT%H:%M:%S

# do not allow anonymous access to this mqtt server
allow_anonymous false

# the password file for mosquitto mqtt
password_file /mosquitto/data/passwd
After the configuration file is in place, the last step is to add a user for accessing Mosquitto (quick edit: I believe you’ll need to start your mosquitto stack before the below command will work):
docker exec -it mosquitto mosquitto_passwd /mosquitto/data/passwd your_mqtt_usernameRun the above command as sudo, or as a user that is part of the docker group. It will prompt you for a password which is up to you to create. You can replace your_mqtt_username with whatever makes sense to you. For example, my MQTT user is frigate so that Frigate NVR can access the MQTT server as a user named frigate. You may just want to add one generic user instead and use that for all services.
And that’s it! You should now be able to start your Mosquitto stack and the logs should indicate it is listening on port 1883.
2023-08-01T15:29:12: mosquitto version 2.0.15 starting
2023-08-01T15:29:12: Config loaded from /mosquitto/config/mosquitto.conf.
2023-08-01T15:29:12: Opening ipv4 listen socket on port 1883.
2023-08-01T15:29:12: Opening ipv6 listen socket on port 1883.
2023-08-01T15:29:12: mosquitto version 2.0.15 running
Random side note: If you want to install nano inside of the mosquitto container for some reason (docker exec -it mosquitto sh), you’ll need to use the apk command. apk update; apk add nano