Original Post: https://h30434.www3.hp.com/t5/Printing-Errors-or-Lights-Stuck-Print-Jobs/Color-LaserJet-Pro-MFP-M281fdw-shows-49-Service-Error-after/td-p/8518589
Requirements:
USBSend:
– USBSend.exe (from hp.com)
– USBSend.exe (from itbacon.com)
Newer Firmware (links updated on 12-24-2023):
– cljmfpM280fw_20230822.ENG.rfu (hp.com)
– cljmfpM280fw_20230822.nativeofficefonts.rfu (hp.com)
– cljmfpM280fw_20230822.ENG.rfu (itbacon.com)
– cljmfpM280fw_20230822.nativeofficefonts.rfu (itbacon.com)
Original Firmware I used:
– cljmfpM280fw_20220414.ENG.rfu (itbacon.com)
Disclaimer: You do this at your own choosing and risk. This is for informational purposes only.
Printer must be installed to your computer via USB cable. When the printer is in FW Update mode, you can add a new printer, local port, USB001 (or 002/003/004), and choose or browse to the m281fdw driver.
If your printer is continually rebooting itself, you will probably need to put it into Firmware Update mode, which will require taking off the left panel of the printer. This isn’t hard, but it’s not super easy either – HP sure likes to add a lot of clips to hold it together. On the back of the printer is where I recommend starting, unscrew the 1 screw holding the side panel on and begin to pry it out and away from the network port and USB port. You’ll need a flathead screwdriver or some other prying type tool, to run along the top edge of the left panel and slowly pop it out.
When you get the panel most of the way off, unsnapping it from the front was tricky, I don’t remember fully what I did. Keep unprying from the top and bottom along the sides and it should eventually come loose.
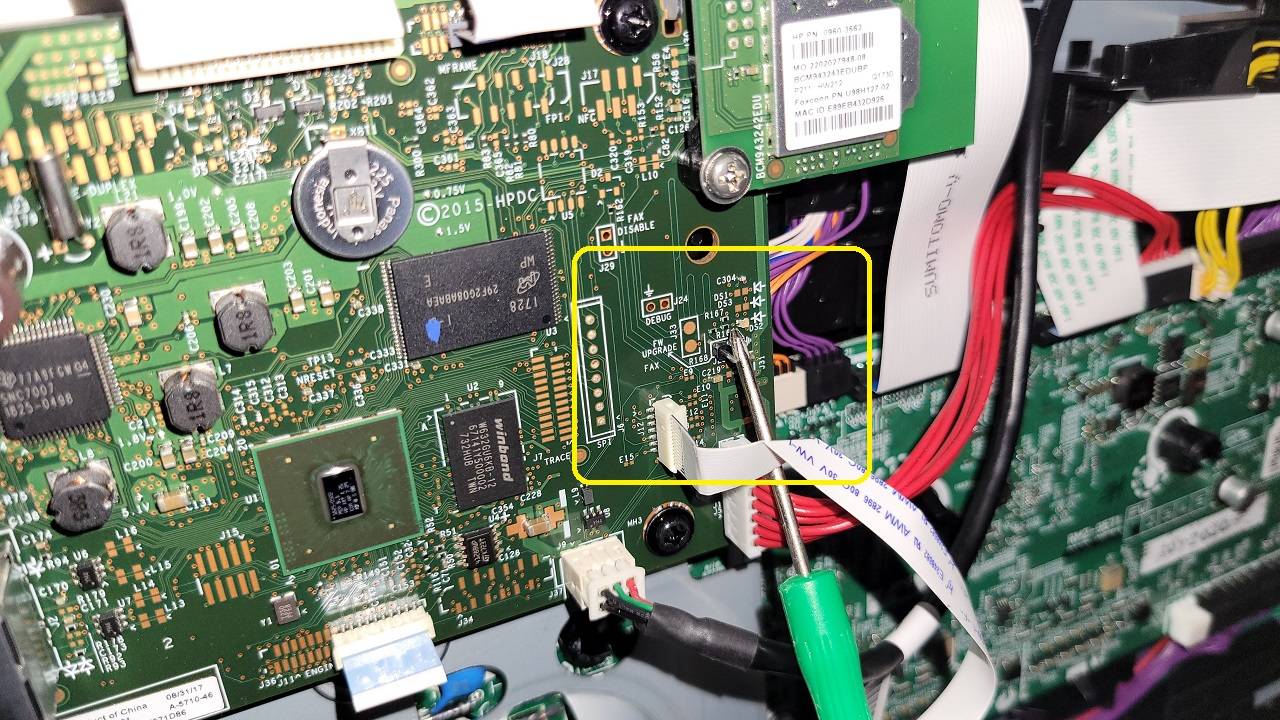
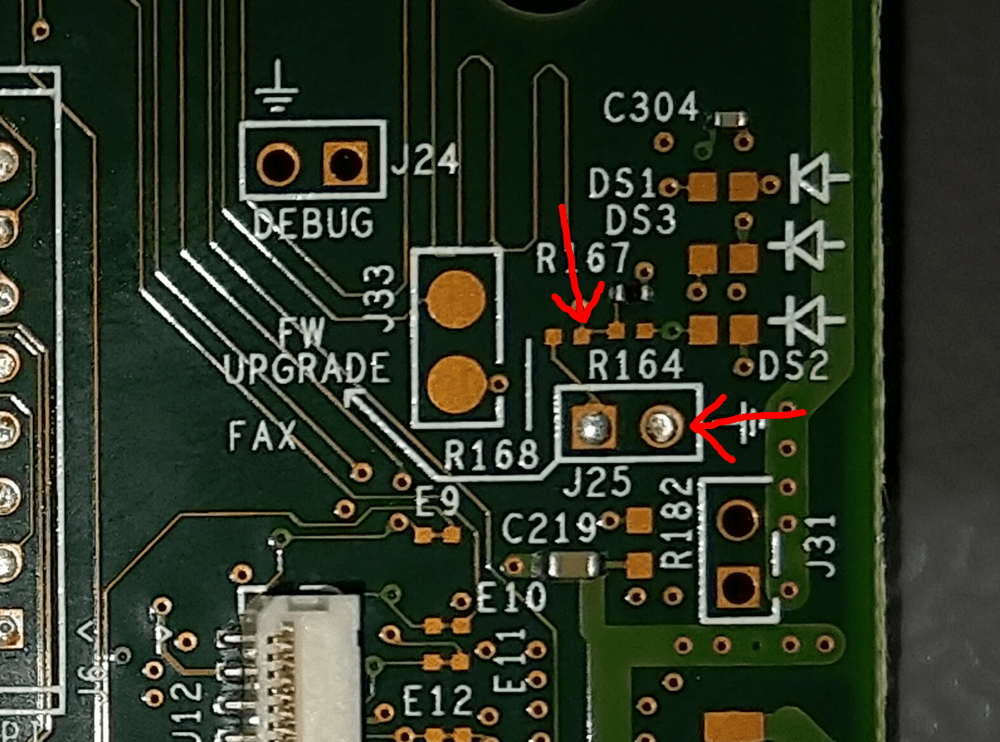
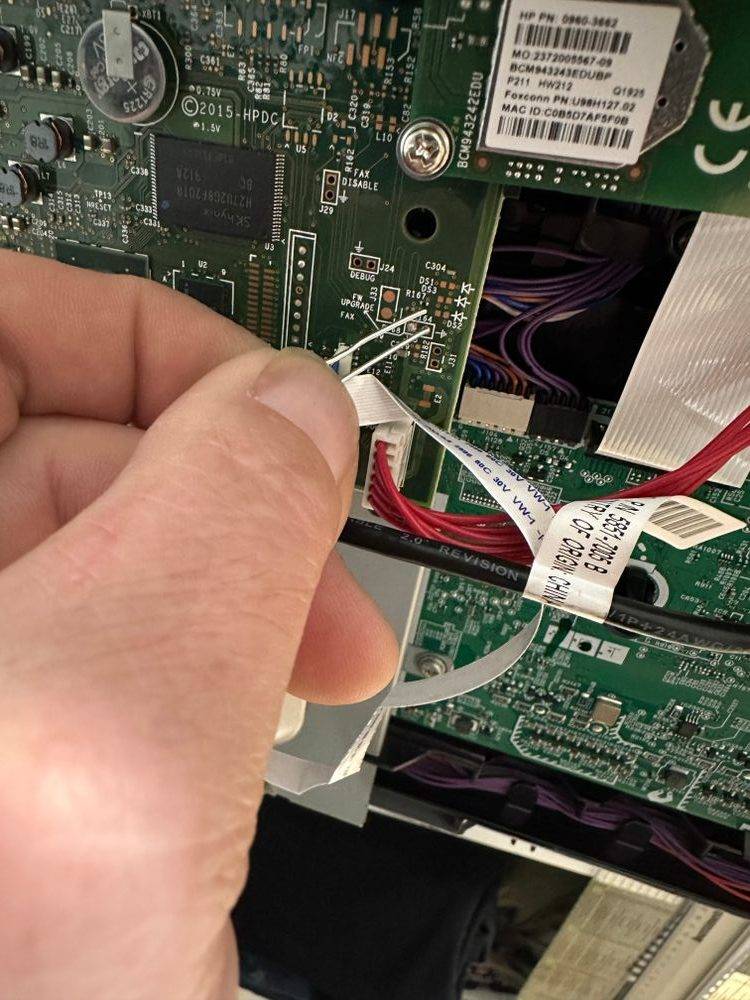
We are looking for 2 pins on the right side of the formatter board:
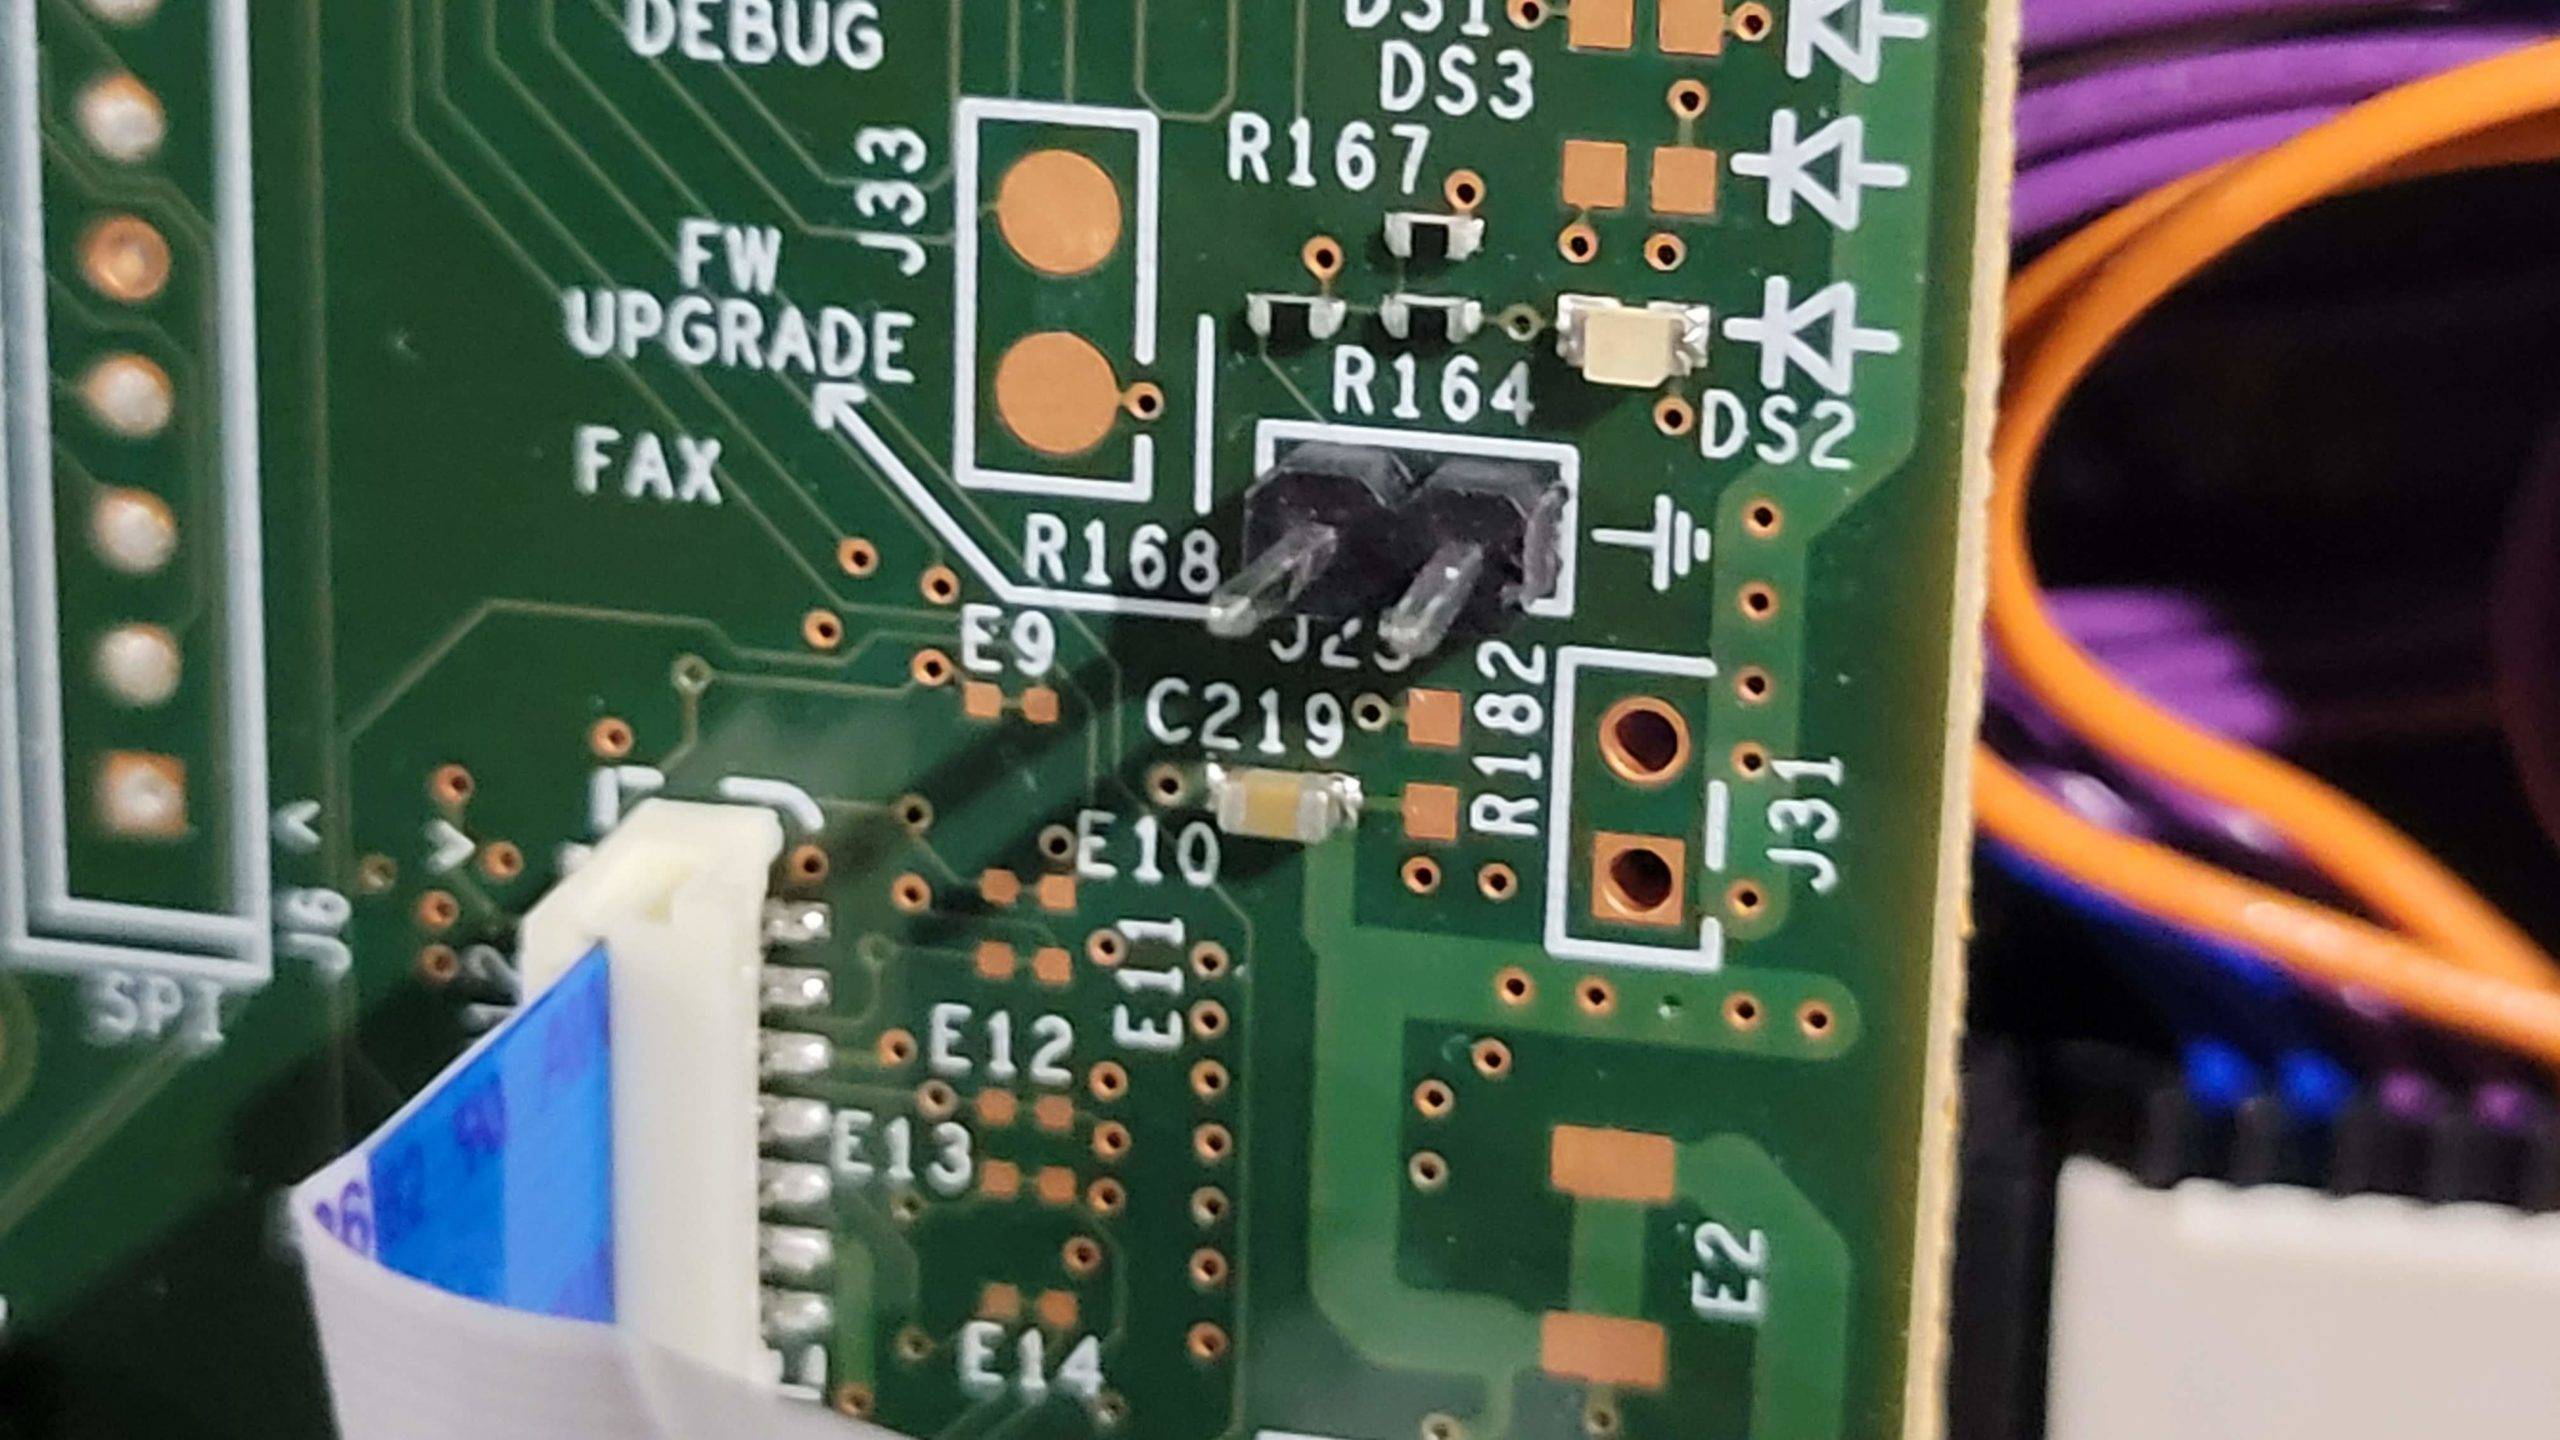
I used a small screwdriver to wedge between the pins while I plugged the printer in:

European Models do not have pins, you’ll need to jump the pads in the middle (thanks to this post)
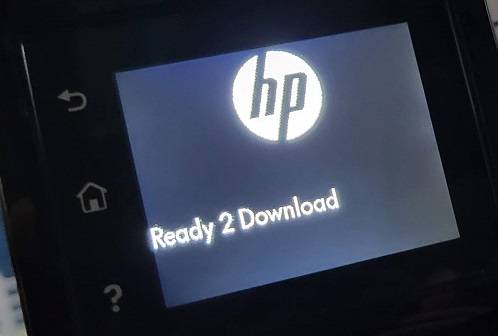
When the printer turns on it should almost immediately come to a Ready 2 Download screen:
Remove your FW Upgrade jumper.
Launching a Command Prompt
You’ll need to start a command prompt. If they were in your downloads folder you should be able to hold shift, and right-click an empty area of the folder (don’t have any files selected) and a menu option to Open PowerShell/Command Prompt should be in the list.
Another method would be to press your Windows Key + R, which should bring up a Run box. Type cmd into the box and press enter to start a command prompt.
If the files are on your desktop, type cd Desktop to ‘change directory’ (cd) into the Desktop folder. Otherwise cd Downloads.
Now all that’s left is to use USBSend to send the RFU file to the printer (note, you must use the ENG version first, ignore the typo in screenshot – you may want to rename the rfu file to something easier to type beforehand):
The format is: usbsend filename.rfu

The printer display will go through Downloading, Erasing, Programming, and should end you at this screen:

Turn the printer off, and then turn it back on, and it should boot-up normally and ask you to select language etc. That’s it!
Afterwards you can download the current firmware updater to install the ‘nativeofficefonts’ firmware: M280_Series_FW_Update-20220414.nativeofficefonts.exe (from hp.com)